Important: don’t forget the : before the second path.
In case you want to Watch the destination folder size in real time, open another terminal windows, ssh to the server, cd to the folder in question and type:
I wanted to migrate from Google to something else (check here) and for that I needed a backup of all my Google Data.
To export you data you can just go to https://takeout.google.com and select the products and services for which you want to export the data and click export.
I first tried with a .zip export, but my backup was 150Gb+ and that meant 50 x 2 GB zip files. After 10 files I didn't want to keep going.
After that, I tried the tar.gz export, which support much bigger file sizes and decided to go with 17 around 10 GB each.
Downloading with the browser was a nightmare and, after that, I wanted to have the files in my local storage server (I have an HP MicroServer with Proxmox running Open Media Vault in a VM), so I would make sense to directly download the files to the server.
After a bit of research I found a way to download Google Takeout files with wget.
Info: Although this may seem easy, Google disables the link when you stop the download from the browser, and the link you can copy from the page does not work.
You can check the references at the end of this post, but the steps are as follows (as written in this answer).
Initiate download via takeout page in your browser
Go to "Window ⇾ Downloads"
Locate the download which is in-progress right now
Right click + Copy link address
From your terminal wget -o filename "url"
Pause the download on the browser and let wget download the file.
Just be sure not to cancel the browser download before your wget finishes.
If you want to do the same, I would recommend the use of screen or tmux so that, should your remote connection reset, the download keeps working in the remote session on screen.
You need a usb stick with a MBR Partition table (GPT does NOT work) for the Microserver to recognize it.
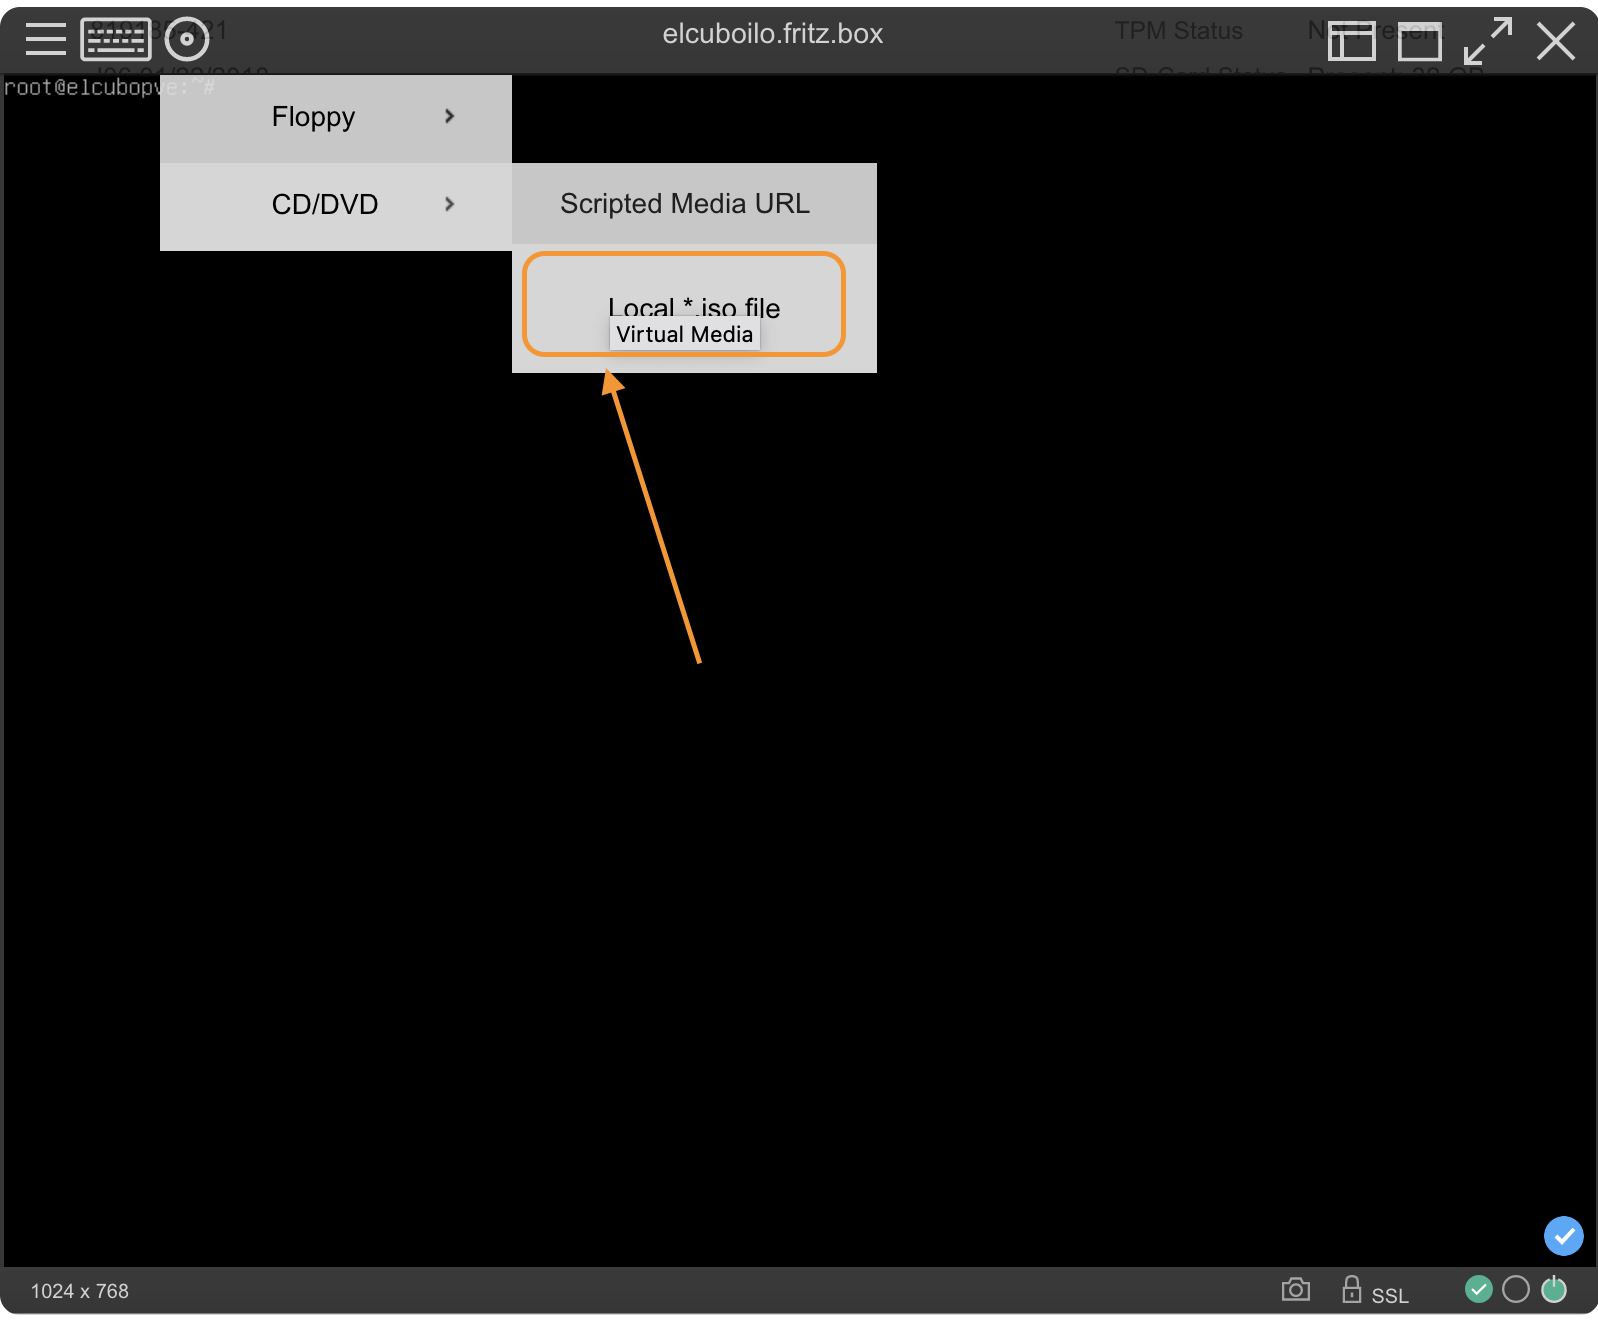
Check Proxmox Docs. Do not use UNetBootin. It gives you an error saying that he can not fin a valid Proxmox ISO. I ended up using a local ISO with iLo anyways.
The Microserver G8 has a problem booting from the 5th SATA (the ODD slot, where the CD-Rom device should go, when there is any disc in the caddies for the HDDs). You need to install grub in a USB or microSD, install it in the internal port and configure the server to boot from there.
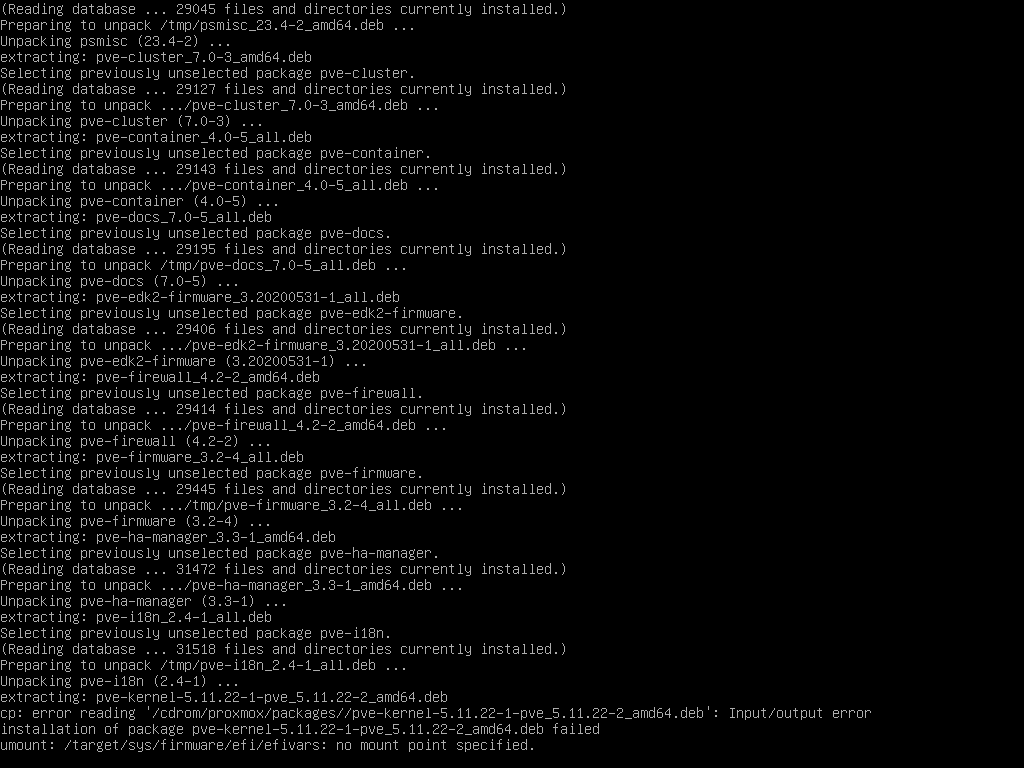
Proxmox 7.0 seems not to be compatible with HPE Microserver G8. Proxmox 6.4 didn’t have any problem and works.
I bought a used server which was preconfigured with the owners old
passwords, so I had to reconfigure it for my needs. Your case may be
different. In my case I had to activate the virtualization capabilities
of the processor, activate all the cores (there were only 2 enabled) and
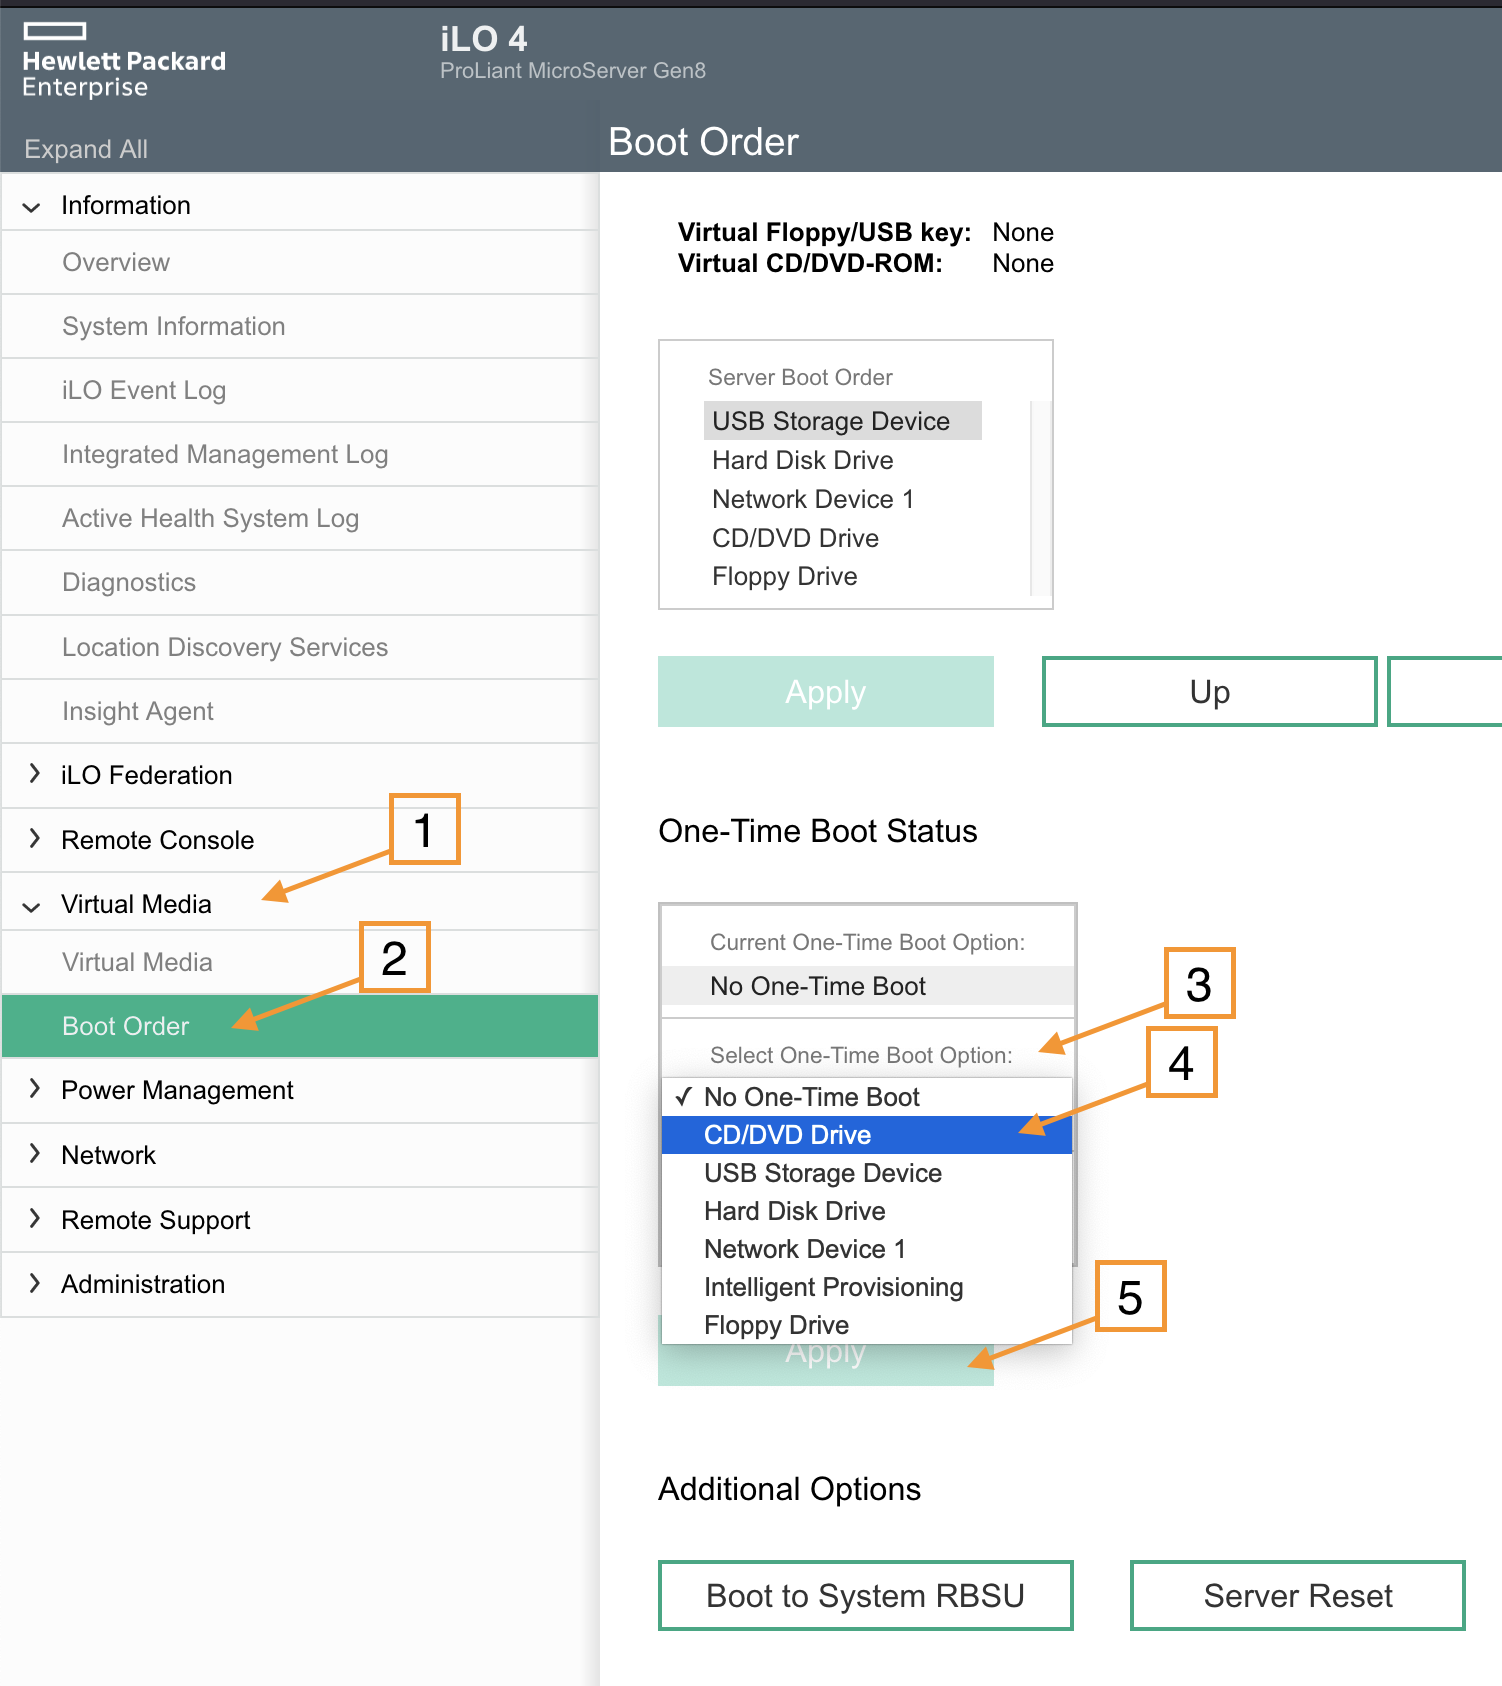
reorder the boot sequence. I also had to configure iLo with my user and
passwords as well as with my own hostname.
In any case, you have to be able to access iLo and open a remote console to follow this guide.
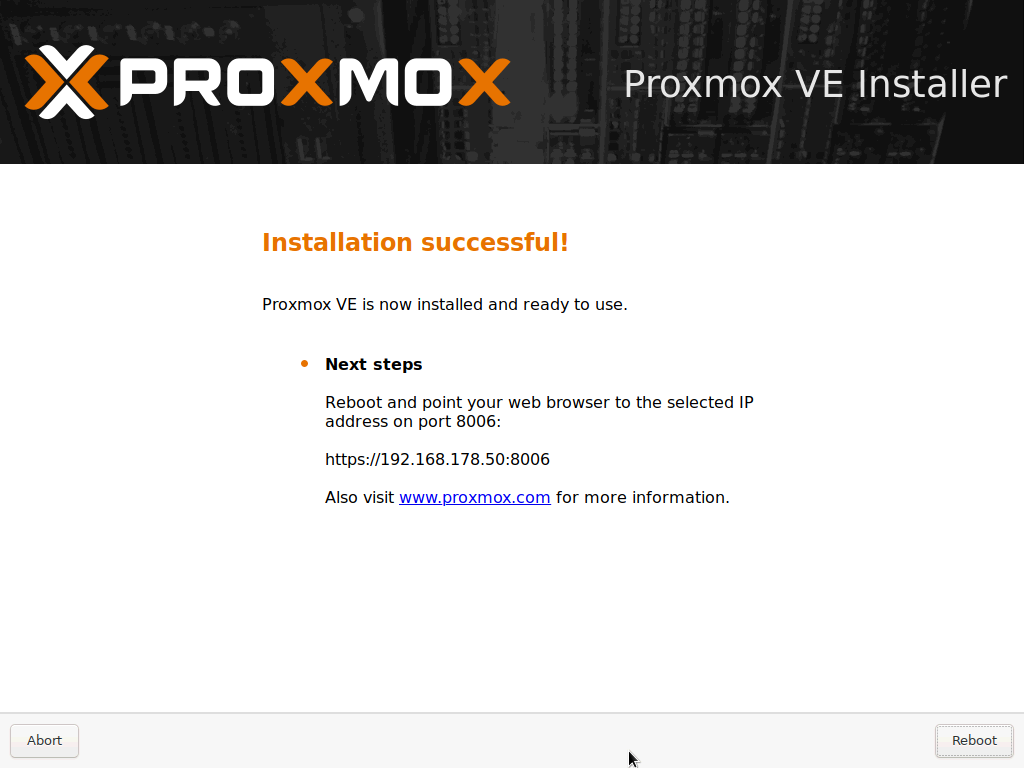
Power on the server. It should boot into a menu to install Proxmox. Follow the instructions.
Just keep in my that the process will delete all data on the installation hard drive, so do proper backups before if you are using a non-empty hard drive.
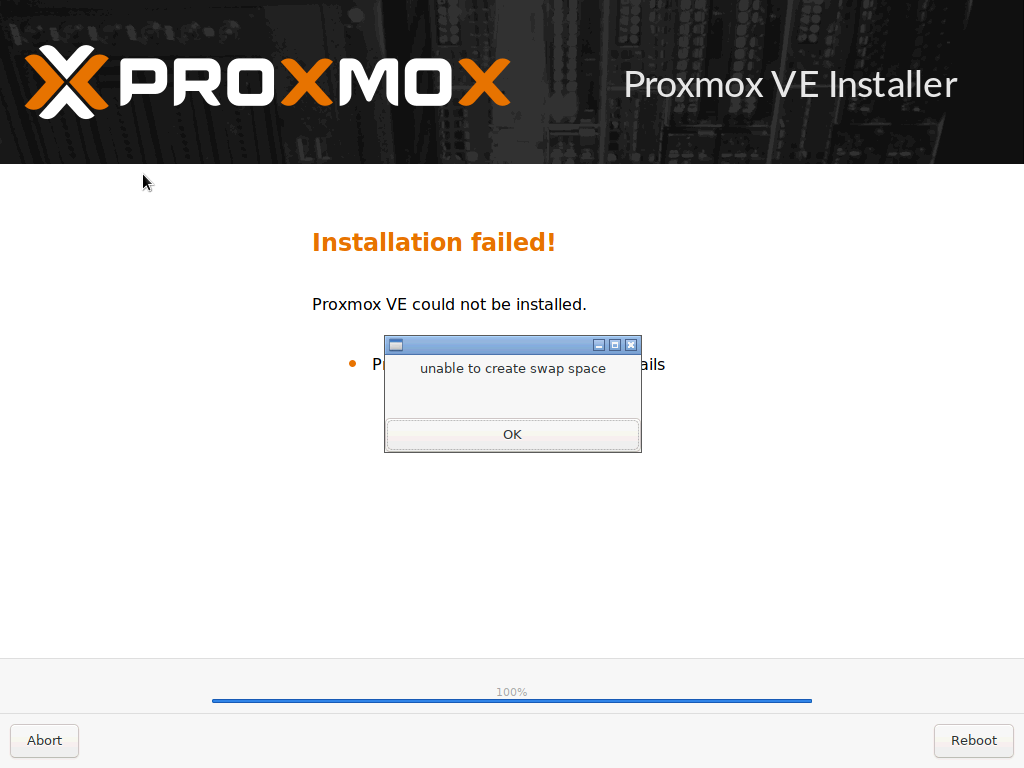
Once it finishes the installation process you get the following screen:
You first need to partition the card, format it to ext2 or ext4 and make
it bootable. You can use a Linux Live CD for this. I used Lubuntu Live
Cd and KPartition.
The tricky part is to find the right disk and the right options for
the grub.cfg to work. I got many Red Screens while testing. In the end I
didn’t try anymore and solved it as follows:
Remove all the hard drives (and only leave the one in SATA 5 (ODD).
Boot into your Proxmox system and login as root. You added a password
as part of the installation.
Mount the SD Card. In my case, with only a HD in SATA 5 and a microSD
and create a boot folder there, I used
Here is where the trick is. Instead of creating grub.cfg by hand,
and because be booted in our running system, we can use
update-grub to create the config file already configured for our
system.
update-grub-o/mnt/sdcard/boot/grub/grub.cfg
And that’s all. We can now boot from the microSD directly into our
Proxmox 6.4 system. Now power-off your server, plug your hard drives
again and power it on. It should boot right to Proxmox :)
My problem was the network, as I was installing Proxmox over the net
with iLo and my Mac was on WiFi (yes, I should not have done that). I
connected a LAN cable and it worked. I had to restart the installation
though.
There was an option in the installation process to customize how the hard
drive was going to be used. I added a swap that was to big (and I would have known that if I had read the Proxmox Installation Documentation before
attempting to install it… but who does that. Anyway you have to know
that you can set a maximum of 8gb for the swap partition.
So you used something that Unetbootin, Etcher or similar to flash your use stick (or micro SD) and it does not boot. Did you read the documentation Prepare Installation Media? I didn’t, and it took me a while to find this.
After searching for some information (see References), I used the following line to search for all the files in all the subfolders and send their paths to lpr using xargs.
This should work if the printer you want to use is set as default. If you want to use a specific printer check the last references, which uses the argument -P "$printer" with lpr to set a printer.
find-iname'*.pdf'|xargs-ilpr{}
This will print all the files found with find in the folder you are in.
There are several reasons to write a book. Some of them are:
to show your expertise
to make money
to communicate your ideas and thoughts
to help you learn
to make a point
just because you can
to create something
In my case, I wanted to write a book to make a point.
Depending on the goal, more or less steps are needed.
For example, if you want to make money from your book, you need to think on a way to:
Sell it (for example publish it on Amazon or another store, create a website, set a price),
publish it with a ISBN (International Serial Book Number, one ISBN required per format),
do some interviews and guest posts,
launch your book,
build a good landing page,
write a remarkable blurb (the text you read as description, which should hook you up)
and so on.
If you just want to write and publish a book for your close ones, some friends, your family, as personal goal or something in between, it requires the same energy and time, without the „selling“ part.
This article is about all of that except from selling it.
First you need to get an idea and, in my opinion, almost any idea works for a start. We will review this point in another time in another post, but it is really important to highlight that your idea will mutate while you are writing your book.
Then you need to choose a tool. Here I will stop. Pick a tool. I don't see so many people writing about this, maybe because it seems easy. Many write about motivation, processes, publishing, pricing, maybe writing style and so on. I have found, for my personal projects, that picking the tool has been by far the most difficult task I have faced. Maybe I'm just picky regarding the tools I use. I have tried:
Illustrator (yes, I wrote the second version of Zen Stories in Illustrator, and no, it was never released),
Scrivener (I bought it and tested it as everyone writes about how awesome it was, and it is, but its workflow it's just not for me),
Ulysses (my personal favourite for now, just a step behind the next one), and
Plain AsciiDoc. This is by far the best workflow I have used for writing.
I wrote (and rewrote) the book La destrucción de la razón in each of the tools I mentioned before, without ever releasing it to the public. The first version I released from that book was the one I transcribed in Ulysses and I printed with Amazon (yes, the do print and, in my opinion, with better quality than Lulu.com).
As I wrote before, I’m pretty picky with the tools I use. The main reason is that they should be able to support any change of mind from me, meaning that maybe I want to write a book for Kindle now, but I want to be able to also publish it in PDF, EPUB and other formats.
My recommendation after having tried all these tools, if you want one, would be as follows:
You just want to write and get a book in print and digital format.
You prefer not to mess with formatting, or backups, or anything. Just use a browser and write. Everything is in Reedsy and stays there.
Reedsy might be by far the most easy way to write and get your book out there, if you are ok with your book having a small note mentioning Reedsy as the tool used. If that is ok with you, just create an account, create a new project, and start writing. The tool allows you to create chapters, add author information and typeset (export) to a Print-ready PDF and an EPUB file.
They also have great resources and articles for authors and a fascinating marketplace with professional editor, book designers and everything you might need.
You want to write without caring about styles (but caring about structure) until the very end. But you want some flexibility and are not afraid of some css-like syntax.
If you are willing to learn Markdown (or if you are using it already) and you want to have a normal Book Layout, then go with Ulysses.
There are many free styles for the PDF export, but if you want to customize the styles, you can edit them by reading their great Styles Reference If you encounter any problem, just use the support contact form. They do answer, and they even sent you the code you need to solve a particular problem which, in my case, worked like a charm (Thank you, Lisa!).
As a bonus, I have to say, from all the options in this list, this is the most mobile-friendly solution (if you use an iPhone and/ or an iPad, as the app is for Apple Devices only).
You want to learn the most „powerful“ and „multipurpose“ tool (as many articles, websites and posts say) and then write something.
This is an outstanding tool, but be prepared to first learn the tool and then write. There are even courses available to learn how to use scrivener to write. You can export a book to many formats and has many integrated tools, which I deem not so necessary for a normal book without lots of research. (I may also be wrong).
You want to have all the flexibility when writing, you like to code, you like to hack things together and are not afraid of investing many hours setting everything up. AND you want to use GIT to version your writing.
Markdown with a platform alas Lean Startup (write, publish, get feedback, repeat). You are a fan of the LEAN Methodology.
I haven’t used this one yet (but I did try it), but it is mainly a version of Markdown. The whole advantage is the platform to distribute your book, with the idea of "continuous delivery" of new versions following the idea of Lean, meaning write a bit, publish, get feedback, improve and keep writing. This is similar to what many startups do when launching a new product or service (AKA Lean Startup).
I learned it the hard way that all those post available on the web have a bit a truth. First one has to write, without editing, and then keep writing. When you feel you have a few pages, chapters or something similar, then you do a backup, and read what you wrote, not before and definitely not during writing. You will find many mistakes, and some things may not make sense at all, but just keep writing. After a while, some things will start to make sense. Keep writing until you are satisfied with the content, the message and the length.
You just have to know that the content will change many times in the next steps, but your core idea should still be there.
Proofread : to read and correct a piece of written work
Edit: to make changes to a text or film, deciding what will be removed and what will be kept in, in order to prepare it for being printed or shown
(Cambridge Dictionary)
Now you have to read what you wrote, and re-read, and re-read. You can also ask your friends or family to read the book and give you feedback. I printed a few copies and asked for written feedback. Then fixed the mistakes and rewrote some parts. And then again, many times.
I also found that some parts were not as I imagined them to be and completely rewrote them again.
You may also hire a professional editor and a professional proofreader for this, and it should make everything easier and faster (if you like this alternative I would recommend Reedsy, as they also have a marketplace for related services). I didn’t, but I learned a lot :)
This means deciding on how the book will look inside. Do you want page numbers, a header, a footer, 1 column, 2 columns, an image before each chapter, an index? These are things you should also think before selecting the tool. For example, it is not possible to auto-create a table of content (ToC) in Ulysses (I used Calibre to edit the EPUB file to add ToC, and for the printed version I just added one manually). Reedsy allows you to add a ToC as well as Scrivener and AsciiDoc.
Depending on the tool you chose, you might want to first check the available layout and formats, or build one just for you. Here is important to define which format you want to have.
Digital formats such as EPUB and mobi are way easier than PDF, mainly because they are not pixel-perfect and are not so flexible in regard to the layout. In a Kindle (or any e-book reader) you can change the font, the font size and many other settings while reading, so as long as the titles and elements on the book are ok you will get a good result.
Print books are more work. Here you need a Print-Ready PDF (this is different from a normal PDF) which has to be in the right dimensions (for example 5,5 in x 8,5 in) and which has to be supported by the provider you chose (more on this in Step 5: Choose a provider for print-on-demand (POD)).
A book should have a cover, and if it looks great, even better.
I made the cover of my book (in Spanish) La destrucción de la razón using Fiverr. You can also hire a designer in some other place, design it yourself, ask a friend to design it, or use one of the cover-creators the above providers have available. I chose Fiverr, and I am happy with the result. If you decide to hire a designer, please ask them to also design the back-cover if you intend to print it. They do a much better job and looks far better than using the cover in the cover-creator from the provider and „manually add“ a back cover without design. I tried… and I found it „unprofessional“.
Here starts the fun part. You will export your book for the desired format (Step 3) and order a proof-copy (if available).
Some providers I would recommend trying are
I ordered copies from Amazon and from Lulu, and I found Amazon to have better quality. I have yet to order from IngramSpark and Blurb, but I have read good reviews about them.
La destrucción de la razón es producto de múltiples divagaciones mentales del autor, las cuales pueden o no tener relación con la realidad. Esta obra es un proyecto personal, autoeditado (con ayuda de muchas críticas constructivas y mucha paciencia) y autopublicado.
A pesar de no ser el primer libro que escribo, sí es el primer libro que publico para que otros lean.
Extracto:
“Era un mundo distinto, distinto a lo que conocemos hoy en día. Un mundo en el que la percepción de la realidad es más importante que la realidad misma. Un mundo en el que las percepciones han sido corrompidas por angustias pasadas y donde la palabra perdón ha perdido todo su significado.
Todos los días al levantarme leía las mismas palabras, una y otra vez, en los diarios y en las revistas. Las radios repetían sin cesar aquellas terribles acciones que se llevaron a cabo siglos atrás, y castigaban con palabras y tiempo a aquellos perpetradores que gestaron el odio en la esencia de cada ser.
He aquí algunas cartas de un anciano reflexionando sobre esta extraña realidad…”
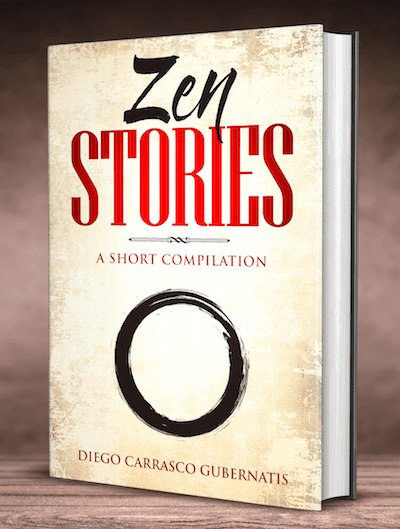
I have been working on a compilation of Zen Stories. It’s soon to be released, first as an e-book and later as a printed copy.
Once it’s ready, the links will be published here.
Extract:
Since ancient times in many cultures, the teachings have been told in the form of short stories, which tend to last in memory longer than any other kind of teaching (besides experience). Some of these stories are really inspiring and enlightening, while some of them are hard to grasp.
In this book, I have compiled those stories which have found a place deep into my mind and have meant a change in how I see the world around me. Please remember that these stories are not meant to be understood in a literal way, but a more spiritual one. They hope to make your mind ponder about some things you are not used to think of.
I hope you enjoy the following stories, and remember, as the (Zen Buddhist) monk Hạnh said:
I was in a pinch. I needed to import 12.000+ files with different filetypes
into a Wordpress Media Library. The easy part, uploading the files with the
folder structure to wp-content/uploads was done quickly, but Wordpress Media
Library didn’t “see” the files.
To have another Google Chrome instance (or many) running alongside your main
instance allows you to separate accounts, plugins and bookmarks.
In this case I wanted to use a just-for-work Mac for personal use, but I
didn’t want to mix bookmarks, plugins and accounts. I do have other devices in
which I run Chrome with my Google account, and I do like the sync feature, but
I don’t like the idea of syncing my personal data to the main instance of
Chrome on this specific Mac as this is not its main use.
That said, here is a way of launching a separate instance of Google Chrome
using the „—user-data-dir“ from the terminal.
Launching a new instance of Google Chrome from the Terminal
Let’s say you have Google Chrome installed at „/Applications/Google Chrome“
and let’s say you want to save your new profile in „/Users/your-
user/Documents/Chrome-Personal“
To do that, you just have to run this command in your terminal:
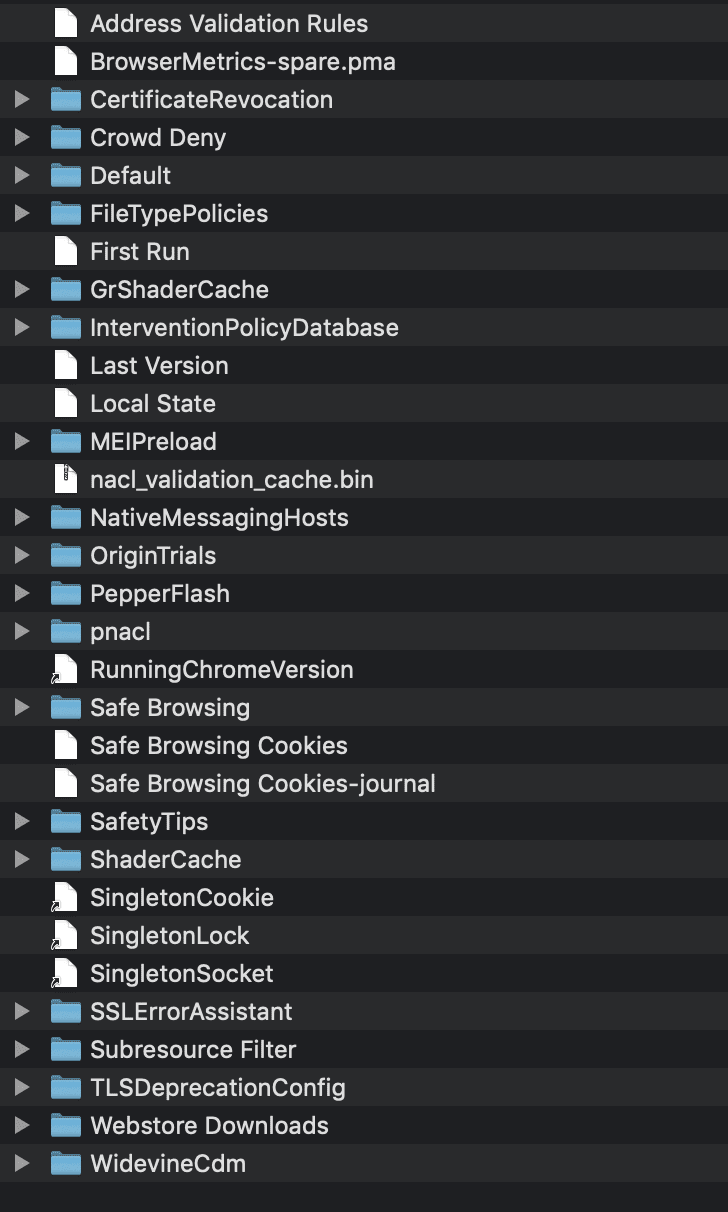
After running the command for the first time the folder will be populated with
all the required files and folders for your profile and all future data for
this instance will be saved here. After the first launch that folder will look
somewhat like this:
Now if you run your normal Chrome instance (the one in /Applications), you
will see one configuration, and if you run the previous command again you will
see your other configuration, all with different plugins, passwords, bookmarks
and accounts.
Making an alias for the command
To laugh this second instance faster you may want to add an alias for such a
command, let’s say personal_chrome.
For this, you have to edit your terminal profile and add the following:
alias personal_chrome="/Applications/Google\ Chrome.app/Contents/MacOS/Google\ Chrome --user-data-dir=/Users/your-user/Documents/Chrome-Personal"
ZSH
If you are on macOS Catalina, then you should, by
default, be using
zsh (I recommend using it with the awesome
ohmyzsh).
To add an alias to „zsh“ just edit or create your ~/.zshrc by adding the
previous alias. After that you have to reload your profile by running
source ~/.zshrc
Bash
If you are running and older version of macOS, then „bash“ is the default
shell. To add an alias you should edit or create your ~/.bashrc by adding
the previous alias. Then reload your profile by running
source ~/.bashrc
After that you can just run personal_chrome in any new terminal, and you will
be opening the new instance (you may add as many instances as you want).