How to install Proxmox VE 6.4 in an old HPE MicroServer G8 on SATA 5 (ODD) using iLo and boot from the microSD card in 2021
Bullet points
Here is a quick summary of what I learned:
iLo is awesome
You need a usb stick with a MBR Partition table (GPT does NOT work) for the Microserver to recognize it.
Check Proxmox Docs. Do not use UNetBootin. It gives you an error saying that he can not fin a valid Proxmox ISO. I ended up using a local ISO with iLo anyways.
The Microserver G8 has a problem booting from the 5th SATA (the ODD slot, where the CD-Rom device should go, when there is any disc in the caddies for the HDDs). You need to install grub in a USB or microSD, install it in the internal port and configure the server to boot from there.
Proxmox 7.0 seems not to be compatible with HPE Microserver G8. Proxmox 6.4 didn’t have any problem and works.
Goal
Install Proxmox on a HPE MicroServer G8 (release on 2013) on the 5th SATA (ODD) and boot from the internal SD Card using Grub.
Installation process
Prepare the server
I bought a used server which was preconfigured with the owners old passwords, so I had to reconfigure it for my needs. Your case may be different. In my case I had to activate the virtualization capabilities of the processor, activate all the cores (there were only 2 enabled) and reorder the boot sequence. I also had to configure iLo with my user and passwords as well as with my own hostname.
In any case, you have to be able to access iLo and open a remote console to follow this guide.
Install Proxmox using iLo
Download Proxmox 6.4 ISO image from here
-
Go to iLo Interface, open a Remote Console

-
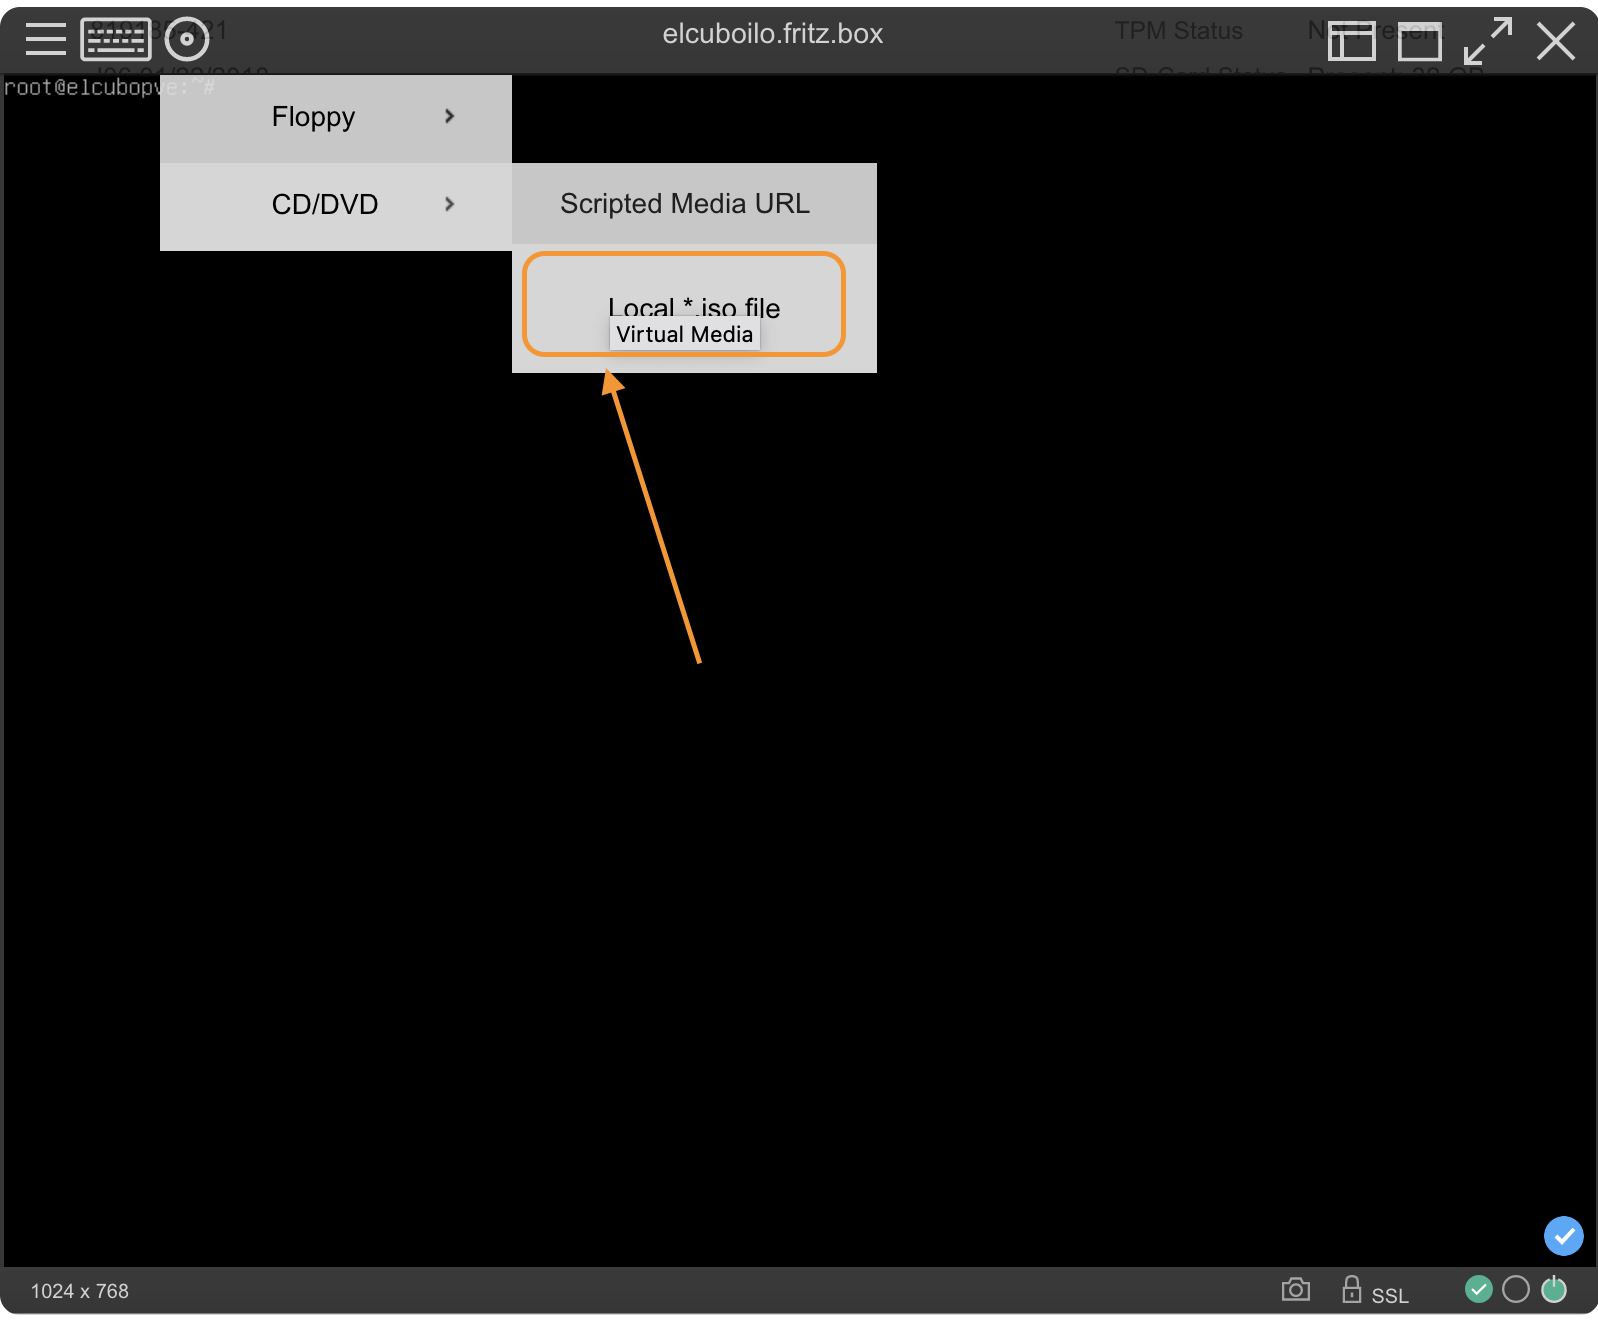
Load the Proxmox ISO (version 6.4)
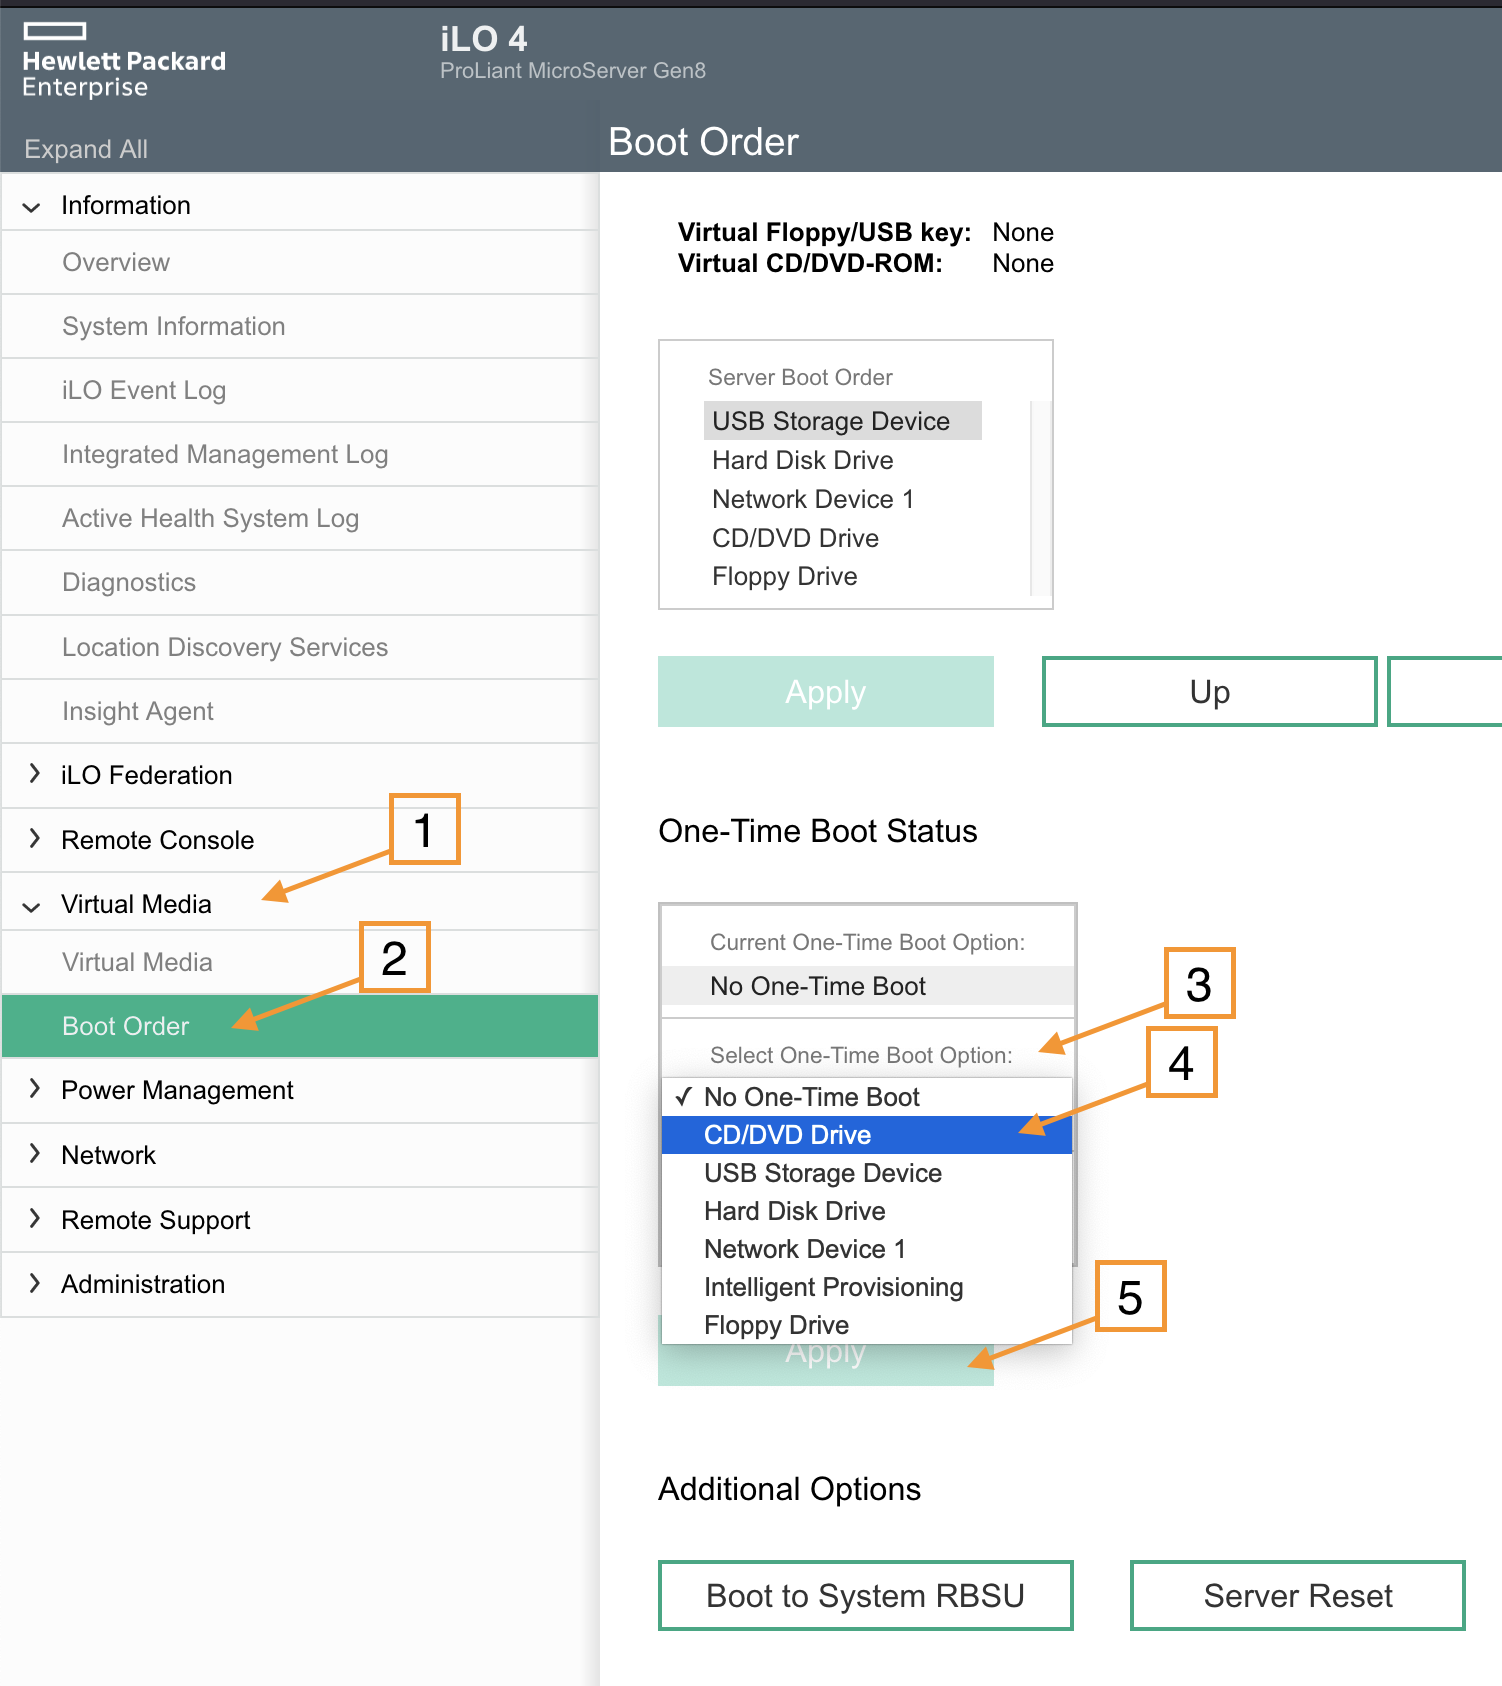
Set the server to boot once from the cd-rom
Power on the server. It should boot into a menu to install Proxmox. Follow the instructions. Just keep in my that the process will delete all data on the installation hard drive, so do proper backups before if you are using a non-empty hard drive.
-
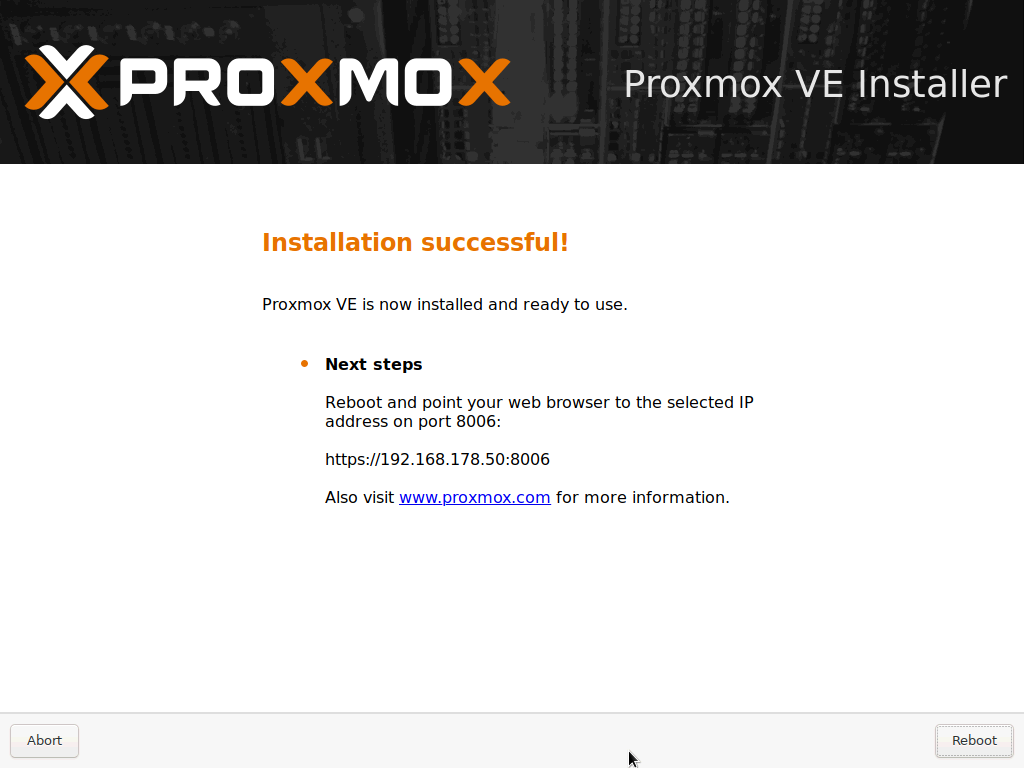
Once it finishes the installation process you get the following screen:
Setup boot
This one was of great help :) https://www.bastelbunker.de/hp-microserver-gen8-booten-von-den-odd-port/
Using a microSD Card to boot and installing grub on it from your Proxmox installation
You first need to partition the card, format it to ext2 or ext4 and make it bootable. You can use a Linux Live CD for this. I used Lubuntu Live Cd and KPartition.
The tricky part is to find the right disk and the right options for the grub.cfg to work. I got many Red Screens while testing. In the end I didn’t try anymore and solved it as follows:
Remove all the hard drives (and only leave the one in SATA 5 (ODD).
Boot into your Proxmox system and login as root. You added a password as part of the installation.
-
Mount the SD Card. In my case, with only a HD in SATA 5 and a microSD and create a
bootfolder there, I used -
Now install grub in the microsd
-
Here is where the trick is. Instead of creating
grub.cfgby hand, and because be booted in our running system, we can useupdate-grubto create the config file already configured for our system.
And that’s all. We can now boot from the microSD directly into our Proxmox 6.4 system. Now power-off your server, plug your hard drives again and power it on. It should boot right to Proxmox :)
Issues, Problems and Questions I had during the process
How to find the name of the device we want to install grub to
The devices get a specific internal name and this changes depending on the port, computer and so on.
Solution
Use fdisk -l to list all partitions. I recognized my device (microSd
card) because of the size.
Proxmox Installation failed. Could not install package pve-kernel…

Could not install pve-kernel package
This was an Input/Output Error as I realized in the terminal.
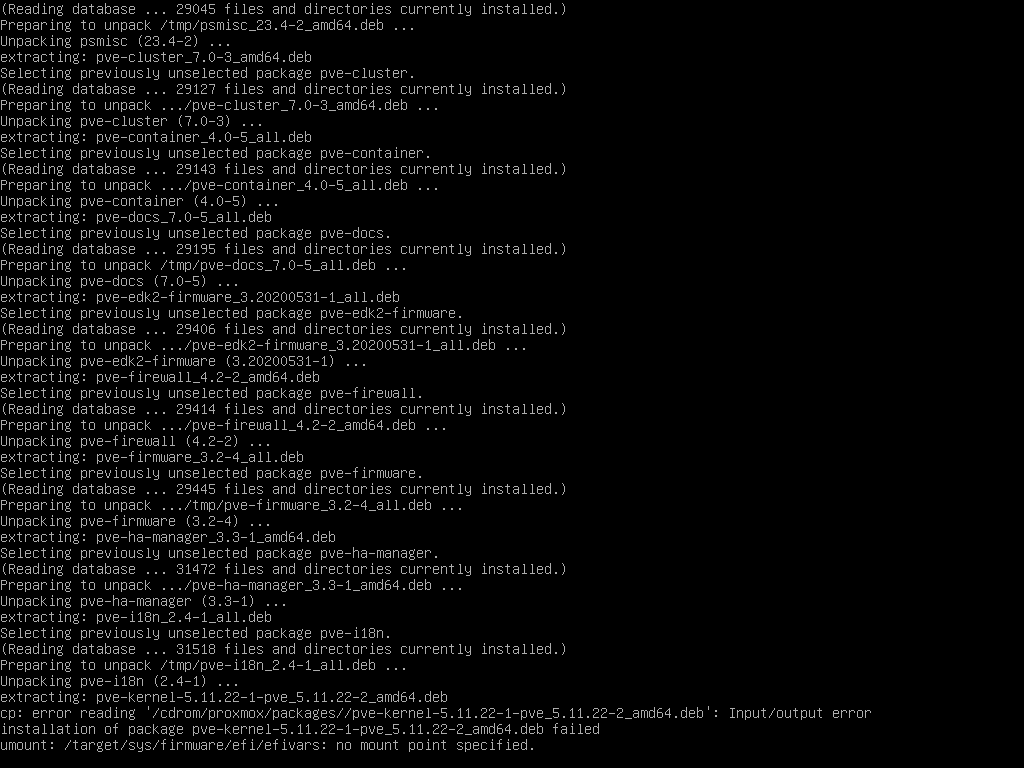
Input/Output error
Solution
My problem was the network, as I was installing Proxmox over the net with iLo and my Mac was on WiFi (yes, I should not have done that). I connected a LAN cable and it worked. I had to restart the installation though.
Unable to create swap space
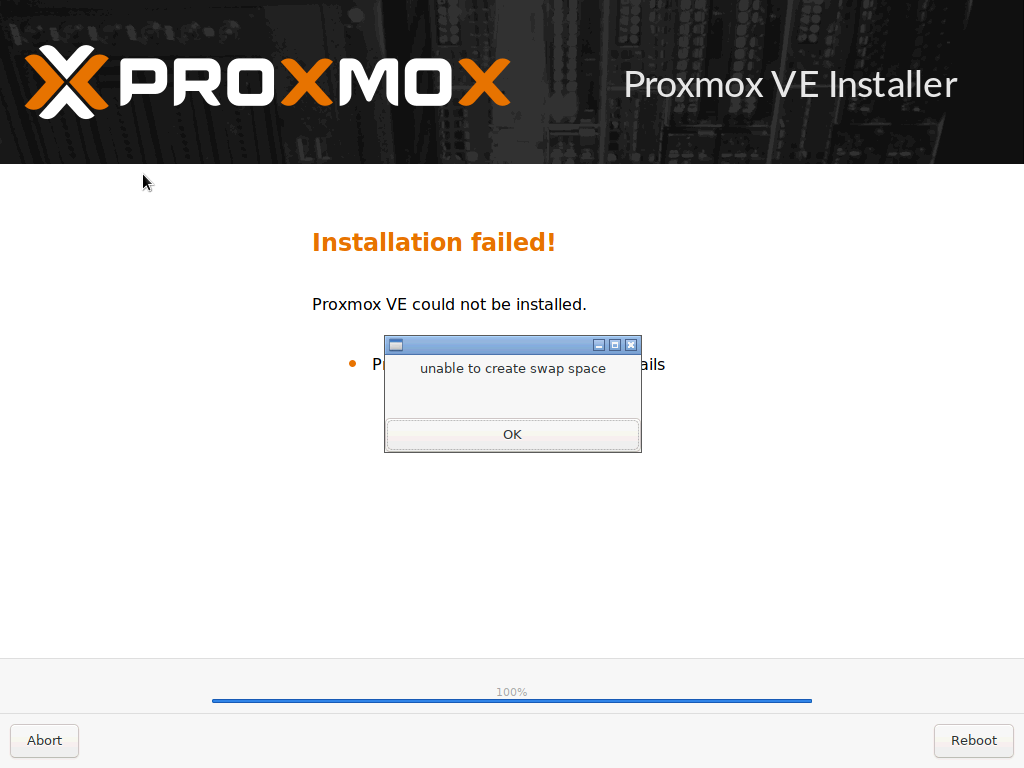
Proxmox installation failed: unable to create swap
Solution
There was an option in the installation process to customize how the hard drive was going to be used. I added a swap that was to big (and I would have known that if I had read the Proxmox Installation Documentation before attempting to install it… but who does that. Anyway you have to know that you can set a maximum of 8gb for the swap partition.

Maximum swapsize for Proxmox
How to find the /dev name of my USB device
See https://superuser.com/questions/352598/how-to-find-the-dev-name-of-my-usb-device.
As quick reference use lsblk in the command line.
HPE Microserver G8 does not boot from my usb stick
You can read more here https://serverfault.com/a/820467/539133 but in summary the server need a USB stick with an MBR partition and not and GPT. You can read more about the differences at https://www.howtogeek.com/193669/whats-the-difference-between-gpt-and-mbr-when-partitioning-a-drive/
Solution
Use MBR Partitions.
I flashed a USB stick with Proxmox, and it does not boot
So you used something that Unetbootin, Etcher or similar to flash your use stick (or micro SD) and it does not boot. Did you read the documentation Prepare Installation Media? I didn’t, and it took me a while to find this.
Solution
Read https://pve.proxmox.com/wiki/Prepare_Installation_Media
In Linux use
dd bs=1M conv=fdatasync if=./proxmox-ve_*.iso of=/dev/XYZIn Windows use https://etcher.io/ or https://rufus.ie/ as indicated in the documentation.
In Mac use
hdiutil convert -format UDRW -o proxmox-ve_*.dmg proxmox-ve_*.iso
References
These are some websites, articles and discussions I read to set this whole thing up. They are in no particular order and I may have left many out.
https://forum.openmediavault.org/index.php?thread/12665-usb-boot-with-hp-proliant-microserver-gen-8/
https://community.spiceworks.com/topic/2281105-hp-proliant-dl360e-gen8-boot-from-usb
https://www.reddit.com/r/homelab/comments/gvd89e/gen8_microserver_still_requires_modified/
https://www.admfactory.com/hp-microserver-gen8-boot-from-ssd-install-on-odd-bay/
https://homeservershow.com/forums/topic/11073-problem-to-boot-from-micro-sd/
https://superuser.com/questions/352598/how-to-find-the-dev-name-of-my-usb-device
https://www.bastelbunker.de/hp-microserver-gen8-booten-von-den-odd-port/
https://unix.stackexchange.com/questions/49989/let-grub-re-scan-disks
https://vitux.com/4-ways-to-view-the-partition-table-in-linux/
https://www.aroundmyroom.com/2016/03/03/hp-microserver-gen8-g1610t-booting-with-usb-odd/
https://cornis-techblog.de/hp-microserver-gen8-vom-25-slot-booten/
https://www.reddit.com/r/homelab/comments/gvd89e/gen8_microserver_still_requires_modified/
https://mikeeman.wordpress.com/2016/11/18/hp-proliant-gen8-microserver/
https://forum.proxmox.com/threads/proxmox-install-on-ssd-but-boot-from-usb.47448/
http://jarrodla.blogspot.com/2014/04/hp-microserver-gen8-boot-from-5th-sata.html
https://homeservershow.com/forums/topic/15546-hp-ms-gen8-ssd-usb-boot/